Skip to content

DUST OFF SAVINGS

20% OFF MICROFIBER DUSTERS

Not valid on previously negotiated prices!

Transform Your Fridge & Oven with Microfiber

Transform Your Fridge & Oven with Microfiber

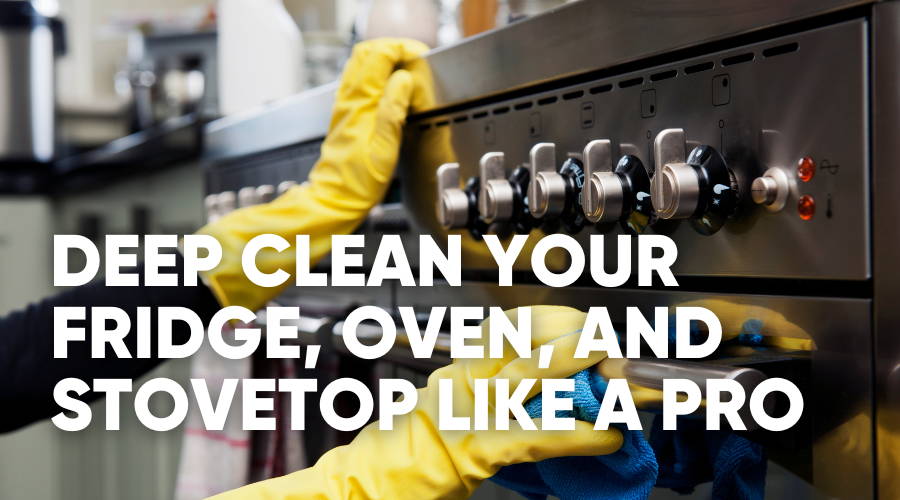
Nobody looks forward to the grueling task of cleaning kitchen appliances. From the greasy- grime splattered stovetops to the burnt-on baking disasters inside the oven to even the comparably simpler stubborn streaks on stainless steel refrigerators, they can all combine to overwhelm even cleaning professionals.

If you’ve ever felt like cleaning your kitchen might be fighting a losing battle, fret not because, with the right pro tricks and the right microfiber, we are going to transform this uphill task into an achievable chore.

Cleaning expert, Melissa Homer, shares her highly guarded tips to make appliance cleaning as safe, speedy, and effortless as possible without sacrificing killer results. These techniques were honed from working 18 years in the professional residential cleaning industry at the headquarters of one of North America’s largest residential cleaning franchises.

Melissa saw firsthand the miraculous transformation and near irreparable damage that can come from appliance cleaning the right or wrong way. So this hard-earned wisdom is not to be taken lightly and can literally save you thousands of dollars in dodged disasters.

a large stainless steel refrigerator in a kitchen

Cleanliness is Cool: Unlock the Power of Microfiber for Your Refrigerator

When it comes to cleaning refrigerators, the biggest struggles are the streaks and grime, both inside and out, finding all the secret places fallen soils can hide, and doing it all without spoiling your food! It's a task that requires a keen eye, preplanning, and, most importantly, the right tools.

Microfiber, with its unique ability to latch onto dirt, trap germs, and absorb soap residue, is the perfect refrigerator cleaning companion. The MW Pro Multi-Surface Towel’s high-quality microfiber cuts through grime, remove food-borne illness-inducing germs, buffs off the residue, and leaves a streak-free shine that will make your fridge look as good as new.

Maintenance Cleaning

When it comes to maintaining the inside of your refrigerator, all you really need is a quality all-purpose microfiber towel, some disinfecting all-purpose cleaner, a toothbrush, and possibly a cooler with ice. If you’re a professional that has to clean whenever your customer asks or a home consumer with a fresh spill that can’t wait, a cooler with ice is critical to remove as much food from the fridge as possible to make enough room to clean the shelves thoroughly.

If you have the flexibility to wait till your fridge has less food inside, maintenance cleaning is easy to do cooler-free with the pushback trick. This old pro trick is to start cleaning by pushing all the food items back as far as you can on the shelf below the one you are cleaning. This will allow you to remove all the items on the shelf you are working on to the freed-up space below, making proper wiping a breeze.

Once you’ve cleaned the shelf, move everything back up, wiping off the bottoms of each item as you do and arranging them in an organized manner. Then simply repeat till complete.

Solving Spills

Ferreting out your fridge’s hidden stink soils is all about gravity. Accidental spills and drips in the refrigerator will always work their way down to the lowest point in the appliance, which is usually under the crisper drawers.  

Every model is different, but most refrigerators have removable drawers and bins to allow for deeper levels of cleaning, so consult your manual. If your shelves' release tabs are confusing or soils have seeped under glass, be sure to search Youtube for videos of how to remove the glass from your brand and model of the shelf because it is rarely as intuitive as it looks.

Once you get to it, cleaning up the yuck is usually a more straightforward task than any all-purpose cleaner, a microfiber scrubbing sponge and a multi-surface towel can clean up in no time. Sometimes an old toothbrush might be needed to scrub out annoying grooves.  

If there are ever really stubborn pools of dried-on mess, a plastic razor blade will help scrape up the yuck without the risk of scratching yourself or the appliance.

Perfecting Your Polishing

But what about the exterior of your fridge? Especially the stainless-steel parts that seem to resist all efforts to keep them streak-free and shiny.

This is where the MW Detail 400GSM Towel comes into play. Water or a disinfecting all-purpose cleaner, combined with this microfiber towel, can achieve an exceptional shine that’s often elusive because microfiber traps the very soap residue that causes streaks.

If you're a fan of the added gloss that comes with polish, remember to first clean the surface before applying the polish, ensuring that you're not trapping any dirt under the oils and waxes. Using the Detail Towel, you'll be able to achieve an incredible shine while using less product than you're used to, saving your budget and Mother Nature.

inside a fridge, freah fruit and vegetables and groceries

How to Clean Inside a Refrigerator

What supplies do you need?

How To Do It Right

TOP DOWN: Start cleaning from the top shelf down to the bins, removing spills and crumbs, and arranging food in an organized manner.

PUSH BACK: Before cleaning each shelf, push the food on the lower shelf back. Then, remove all the food from the shelf you're cleaning and place it on the pushed back lower shelf.

SPRAY & WIPE: Lightly spray your all purpose cleaner on the shelf, side walls, and back wall. Scrub with a scrubber sponge and scrape with the plastic razor as needed. Wipe clean with a microfiber towel.

BOTTOMS UP: Dampen a microfiber towel with your all purpose cleaner and wipe the bottom of each food item before placing it back on its original shelf. Keep labels facing forward.

IDENTIFY SUSPECTS: Throwing out food that is expired (check dates) or rotting as you work.

RINSE & REPEAT: Repeat the method working down the shelves. For the bottom shelf, remove food items and place them on a clean microfiber towel. Work quickly to avoid food getting warm.

CLEAN BINS & BOTTOM: Empty food onto the clean towel, then pull out the bin (if it comes out easily) and spray and wipe inside and outside with your all purpose cleaner. Clean under the bins with the sponge or plastic scraper as needed, then refill and replace the bins.

DELVE INTO DOORS: Use the clean towel to store food while cleaning door shelves. Spray and wipe shelves, wipe bottoms of items, and replace them facing forward.

FREEZER FIXING: Do not clean freezers with food inside, unless you have a cooler to store the food in while you work. Once empty, spray a microfiber towel with your all purpose cleaner and quickly wipe it out. Do not spray the freezer surface to avoid chemical freezing.

SWIPE SEALS: Wipe down the sides and seals of the refrigerator/freezer doors and the front edge of the body of the refrigerator with a microfiber towel sprayed with all purpose cleaner.

FINAL SHINE: Wipe down the front, accessible sides, and top of the refrigerator with a microfiber towel sprayed with all purpose cleaner. Buff to a shine with a dry towel.

Professional Tips: Refrigerators should be cleaned as often as needed, or if something has spilled inside, but at a minimum, every three months. Consider adding a magnetic meal planning weekly calendar to your fridge door to plan meals to use up older ingredients if you find a bunch of expired items while cleaning.

Microfiber Scrubbing Sponge

 
Premium microfiber on one side, non-scratch scrubby fabric on the other, sewn together to last hundreds of washes. Scrub the kitchen, bathrooms, dishes, and more. Check price

16”x16” MW Pro Multi-Surface Microfiber Towel

Plush microfiber is designed to pick up more dirt and leave fewer streaks while lasting over 300+ washes, helping you clean faster. Check price

Windex Multisurface Disinfectant Cleaner

A disinfecting all-purpose cleaner is a must to battle dirt, germs, and streaks. Windex multi-surface is ammonia free, making it safe for most surfaces, including washable paint and finished wood.

Titan Plastic Razor Blade Scraper

Scrape stuck on food, paint, and other stubborn soils without risking cutting yourself or scratching surfaces.


More Information: Looking for insider cleaning and maintenance advice? Check out Porch's comprehensive guide, featuring our own insights and much more!

Oven Overhaul: Conquering Your Stovetop and Oven with Microfiber

Kitchen appliances like ovens and stovetops can be the toughest to clean, given their continuous exposure to heat, grease, and food spills. But just as it worked for the refrigerator, microfiber is the key to unlocking the softer side of these appliances as well.

Microfiber is designed to trap dirt, grease, and soap residue, making the otherwise taxing task of cleaning these appliances far more manageable. Once again, the MW Detail 400GSM Towel proves to be a star player in restoring the shine of glass stovetops and the stainless-steel exteriors of ovens.

There's a caveat, though — microfiber is oleophilic, which means it attracts and binds to oils. This property makes it excellent for cleaning stove tops and ovens, but it also means your towel will need a thorough cleaning afterward. A specialty microfiber detergent like Rags to Riches effectively removes oils and extends the life of your microfiber.

Alternatively, for heavier tasks like cleaning the inside of ovens, disposable microfiber wipes like our MWipes are a true game changer. They're designed to handle tough cleaning tasks and are affordable enough to be disposed of guilt-free.

Here's your step-by-step guide to a shiny, clean oven and stove top:

a clean white gas stovetop

How to Clean a Stove Top

What supplies do you need?

How to Do It Right

IDENTIFY: Determine if the stove top is gas, electric or glass.

      • Gas: Grates and burner tops can be removed and soaked in the sink with hot water & dish soap
      • Electric: Remove and wipe coils. Drip pans can be soaked in the sink with hot water & dish soap
      • Glass: There are no items to be removed. Be cautious not to use heavy abrasives.
      • Stainless Steel: Be cautious never to drag heavy grates on stainless steel. Lift carefully.

PREPARE & PRESPRAY: Remove any large loose debris or food bits with a microfiber towel. Spray stove top down with all purpose cleaner (use degreaser if heavily soiled). Spray grates as well if they cannot be removed and soaked in the sink. Wait at least 10 minutes for cleaning products to soak.

CLEAN CONTROL PANEL: While the stove top soaks, wipe down the back control panel and front doors with your all purpose cleaner and microfiber towel. Remember to wipe the handles and knobs (clean underneath, if they are removable).

SCRUB STAINS: Scour down the stove top with your non-abrasive sponge. If it is stainless steel, only scrub in the direction of the grain. If glass, only use gentle abrasives or cooktop cleansers. If there are any stubborn stains on the glass, use a plastic razor blade to carefully scrape off the debris.

WIPE CLEAN: Dampen a microfiber towel with warm water and wipe down the stove to remove grease and soap residue. Dry surface with a dry microfiber towel.

BURNERS & GRATES: For gas stoves, scrub the burners in warm soapy water. If there are any stubborn stains, you can use a soft-bristled brush. For electric stoves, scrub the drip pans in the sink and wipe down the coils with a damp microfiber towel*.

REASSEMBLE: Dry all burners, grates, and drip pans and return them carefully. Be careful not to scratch stainless steel with heavy grates.

BUFF TO A SHINE: Inspect your work, rubbing down the surface with a dry microfiber towel to work up a nice shine

Professional Tips: Stove tops should be cleaned as often as needed, or if something has splattered on them, but at minimum every two weeks. Never use anything heavily abrasive, like green heavy-duty scouring pads, steel wool pads, or pumice sticks on stovetops.
*Critical Warning: Truly neglected drip pans in electric stovetops can never be scrubbed back to new without endless scouring and potential scratching. It is less expensive than your labor to replace them.

Microfiber Scrubbing Sponge

 
Premium microfiber on one side, non-scratch scrubby fabric on the other, sewn together to last hundreds of washes. Scrub the kitchen, bathrooms, dishes, and more. Check price

16”x16” MW Pro Multi-Surface Microfiber Towel

Plush microfiber is designed to pick up more dirt and leave fewer streaks while lasting over 300+ washes, helping you clean faster. Check price

Windex Multisurface Disinfectant Cleaner

A disinfecting all-purpose cleaner is a must to battle dirt, germs, and streaks. Windex multi-surface is ammonia free, making it safe for most surfaces, including washable paint and finished wood.

Easy Off Specialty Kitchen Cleaner & Degreaser

This degreaser can cut through grease and grime but is surface safe for everyday use on stove tops, counters, oven hoods, microwaves, and more.

Weiman Cooktop Cleaner and Polish

The convenient cream cleanser polished away glass cooktop buildup without any risk of damage to the glass or paint.

Bar Keeper’s Friend

Our favorite gentle yet effective acidic abrasive powder! Tackles hard water minerals and stove-top build-up with ease. Powered by Oxalic Acid and Felspar, it doesn’t scratch and is safe for food contact surfaces when properly rinsed.

Dawn Professional Manual Pot & Pan

The best-kept secret in home cleaning. The Professional formula of Dawn only takes 1oz to make 10 gallons of soapy water, making it the cheapest yet most effective dish soap on the market!

Titan Plastic Razor Blade Scraper

Scrape stuck on food, paint, and other stubborn soils without risking cutting yourself or scratching surfaces.


spraying inside of an oven wearibg disposable blue gloves

How to Clean Inside an Oven

What supplies do you need?

How To Do It Right

IDENTIFY: Read the oven label or instruction manual to determine if it is a Self-Cleaning, Manual Cleaning, or Steam-Clean Oven.

      • Self-Clean: Only use oven cleaner that is safe for self cleaning ovens.
      • Manual-Clean: Can use a traditional oven cleaner, but I still recommend using self-cleaning oven cleaner, as it’s far safer with less fumes.
      • Steam-Clean: Use water only and follow only the manufacturer’s instructions.

PROTECT: Spread out a couple trash bags on the floor in front of the oven door and cover with a thick layer of newspaper. Dampen a clean towel with water and set it on the newspaper.

SAFETY: Put on your safety equipment – goggles, rubber gloves, and face mask.

SPRAY: Pull out the racks from inside of the oven and lay them out on a trash bag, spray with all purpose cleaner, and let them soak.

SOAK: In the empty oven, spray the inside walls and inside door with oven cleaner. Be careful not to overspray onto cabinets or floors. Wipe overspray off immediately with the damp towel.

WAIT: Close the oven door, place your safety equipment on the newspaper, and clean the rest of the kitchen, letting the product soak (manual cleaner = 10 min | self-cleaning cleaner = 1 hour).

SCRUB: Scrub the oven racks with your hand pad. Remove the soap by wiping them clean with a microfiber towel dampened with water. Dry them and set them aside.

SCOUR: Put back on your safety equipment and scrub the inside walls and inside door with your hand pad or sponge. If spots remain, spray more cleaner and rub gently with the pumice stone to remove stubborn carbon deposits.

RINSE: Wipe out the inside of the oven and door with microfiber towels dampened with water until the surface is clean. Throw the soiled towels and sponge in the trash bag.

SHINE: Spray a new towel with all purpose cleaner and wipe down the inside to remove any last residue. Replace the cleaned racks and grates.

CAUTION: Do not use towels or pads used inside the oven on any other surface. Use a fresh towel and all purpose cleaner to wipe down the exterior of the oven.

CLEAN UP: Throw the newspaper in the trash bag, then throw your rubber gloves and mask in. Place your goggles in the kit. Use the clean trash bag the grates were placed on to empty the trash.

Professional Tips: Ovens should be cleaned as often as needed, or if something has splattered inside that is causing smoke, but at minimum, every six months. The pumice stick, when used on a damp surface, is a safe lifesaver for inside neglected ovens but a disaster for stovetops, so only use it where it belongs.

MWipes™ Reusable Microfiber Cleaning Wipes

High-quality microfiber that’s good enough to reuse but cheap enough to throw away if you’re cleaning something that won’t launder out safely. Check price

Microfiber Scrubbing Sponge

 
Premium microfiber on one side, non-scratch scrubby fabric on the other, sewn together to last hundreds of washes. Scrub the kitchen, bathrooms, dishes, and more. Check price

16”x16” MW Pro Multi-Surface Microfiber Towel

Plush microfiber is designed to pick up more dirt and leave fewer streaks while lasting over 300+ washes, helping you clean faster. Check price

Windex Multisurface Disinfectant Cleaner

A disinfecting all-purpose cleaner is a must to battle dirt, germs, and streaks. Windex multi-surface is ammonia free, making it safe for most surfaces, including washable paint and finished wood.

Easy-Off Fume Free Oven Cleaner

One of the safest yet most effective oven cleaners on the market. Fewer fumes without less power. Longer soak time is a small trade-in for avoiding burns and surface damage.

a shelf with pasta and rice stored in containers

Coming Up Next: Cabinet Confidence

You are now fully equipped with the knowledge and tools to clean your fridge, stovetop, and oven like a pro (unless, of course, you don’t own any of our microfiber yet, in which case add it to your cart now).

But we're not done yet! Be sure to come back this Thursday for "Cabinet Confidence: Microfiber for Pristine Pantries, Cabinets & Drawers." You've tackled your appliances; now, it's time to take on those grimy cabinets, disorganized drawers, and crumb-filled pantries.  

We’ll even reveal the restoration tricks the Pros use to remove near-impossible challenges like fine wood cabinets covered in years of neglected grease or even the most dreaded of all, cigarette smoke! Set your reminders NOW!

Our curated cleaning kit for homeowners

We’ve curated a cleaning kit of our favorite must-have products to keep a home in top shape. It contains two types of microfiber towels, a microfiber duster, and a heavy duty mop it. Check it out!

Easiest Way To Mop Your Floors


Related Products

  • Featured Articles

    product_18-premium-microfiber-wet-mop-pad-2-packproduct_microfiber-wall-wash-mop-pad-3-packproduct_microfiber-wall-wash-mop-systemproduct_mwipes-reusable-microfiber-wipes-box-of-50-10x12-blue-case-of-8product_pack-of-48-16-x16-buff-pro-multi-surface-microfiber-towelproduct_professional-microfiber-mop-system-1 How to Wash Painted Walls Like a Pro
    product_16x16-disposable-microfiber-cloths-case-of-500product_case-of-16x24-microfiber-waffle-weave-towelsproduct_microfiber-glass-cleaning-packproduct_mwipes-reusable-microfiber-wipes-box-of-50-10x12-blue-case-of-8product_pack-of-48-16-x16-buff-pro-multi-surface-microfiber-towelproduct_professional-microfiber-mop-system-1 The Complete House Cleaning Supplies Checklist
    product_12-x12-buff-pro-multi-surface-cleaning-cloth-12-packproduct_microfiber-flexible-fluffy-duster-2-packproduct_microfiber-glass-cleaning-packproduct_mwipes-reusable-microfiber-wipes-box-of-50-10x12-blue-case-of-8product_pack-of-48-16-x16-buff-pro-multi-surface-microfiber-towelproduct_professional-microfiber-mop-system-1 15 Common Cleaning Mistakes You’re Probably Making
    FAQ's

    Find answers to our most frequently asked questions.

    How To Videos

    Watch how to efficiently and effectively use your microfiber.

    Articles

    Articles and tech tips on how to best use and care for your microfiber.

    Interviews

    Learn the best microfiber cleaning techniques from practiced professionals.