Skip to content

DUST OFF SAVINGS

20% OFF MICROFIBER DUSTERS

Not valid on previously negotiated prices!

HOW TO CLEAN SHOWERS LIKE A PRO

HOW TO CLEAN SHOWERS LIKE A PRO

Whether you’re a tenant, homeowner, or cleaning professional, we can all agree that learning how to clean a shower is one of the most tedious and time-consuming tasks. Though, to maintain hygiene in the bathroom, professional shower cleaning is something that needs to be done regularly.

So how do the professionals clean showers efficiently and effectively, day in and day out, without breaking their back?

In this article, you'll learn how to:

  • Remove soap scum, water stains, mold, and mildew from your shower and grout
  • Clean your shower head, shower glass, and shower curtain liner
  • Select the proper cleaning products for the job

Top 3 Essential Products for Cleaning Showers

#1 Best for Hard Water Stains #2 Best for Mildew & Mold Stains #3 Best for Soap Scum Stains

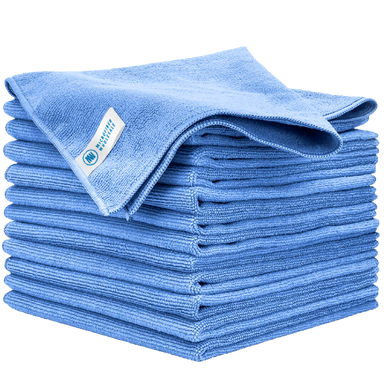
Multi-Surface Microfiber Towels

⭐⭐⭐⭐⭐

Microfiber Scrubbing Sponge

⭐⭐⭐⭐⭐

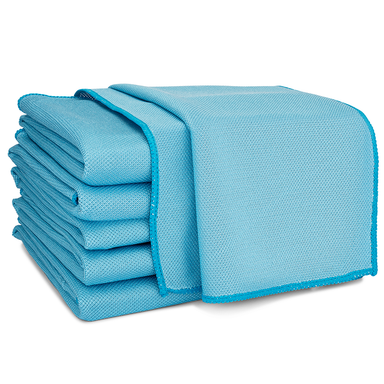
Microfiber Glass Cleaning Cloth

⭐⭐⭐⭐⭐

16”x16” MW Pro Multi-Surface Microfiber Towel Microfiber Scrubbing Sponge 16" x 16" Microfiber Glass Cleaning Cloth

Best for:

  • Scrubbing hard water stains from your shower tiles
  • Removing the hard water stains off the openings of shower heads
  • Wiping the drip patterns caused by hard water off shower glass

Best for:

  • Cleaning the grout in your shower to avoid moisture absorption that would encourage mold growth
  • Scrubbing window sills that have been exposed to shower water and likely to develop mold
  • Wiping the buildup off the shower curtain before it worsens to mold

Best for:

  • Drying the grout in your shower to avoid the buildup of soap scum stains
  • Polishing off the mirrors in your shower that have soap scum stains
  • Finishing off the shower glass after rinsing with clean water to avoid soap scum stains

We've established that cleaning showers is at the bottom of the priority list, but it still has to be done for health and aesthetics reasons. I'll take you through the intricacies of how to clean a shower, right from identifying the soils to choosing the right products.

By the end of this article, you’ll know the best way to clean shower.

#1 - Which Stain Are You Trying to Clean in Your Shower?

Cleaning the shower is a back-breaking task, and there are many ways it can be done.

You may opt for harsh or toxic cleaners and a lot of elbow grease, but the best way to clean shower is to work smarter, and not harder, by following these shower cleaning tips from a professional.

Removing hard water, soap scum, and mildew from showers with as little damage and fatigue as possible is vital. First, you want to take the time to correctly identify the specific soils and surfaces before diving in.

Different soil types and surfaces require particular cleaning chemicals and tools to get the job done, and what works on one soil type can worsen other soils. Not all dirty showers are created equal, after all.

You’ll usually find three types of stains in a shower. These are:

  • Hard Water
  • Mildew and Mold
  • Soap Scum
The three types of stains infographic

Hard Water Stains

Hard water is usually chalky white calcium and magnesium deposits on shower glass. And tub rings, often in the shape of dried water droplets and drip patterns.

Red or green rust stains are also part of the hard water family. The iron that causes these stains is another chemical common in hard water.

Mildew and Mold Stains

Mildew and mold are usually slimy on the surface with colorful stains, typically black, green, tan, brownish gray, or pink.

Fun fact, the scientific names for each type of mold found in your bathroom are called:

  • Black: Stachybotrys chartarum
  • Green: Aspergillus
  • Tan: Talaromycosis
  • Brownish gray: Cladosporium
  • Pink: Serratia Marcescens

It grows where moisture lingers longest in the shower, such as in unsealed grout lines that absorb water.

In some cases, you can find mold on window sills that are exposed to the shower water. Knowing how to clean a shower affected by mold and mildew is essential for a healthy bathroom environment.

Soap Scum Stains

Soap scum is a crusty waxy film made when the chemicals of hard water, calcium, and magnesium, mix with soap residue. How to clean a shower plagued by soap scum is a challenge to many.

The textured nature of the scum also traps bacteria, body oils, dead skin cells, and other debris, giving it a greasier and bumpier feel than just superficial hard water deposits.

"When using the glass cleaning cloths along with regular microfiber cloths and water, the windows and mirror turn out beautiful and there's no chemical smells." - Lisa Hall, United States

#2: Choose the Best Cleaning Solutions for Grime

Now that you’ve identified the soils, it’s time to choose professional shower cleaners.

The best cleaning products infographic

Hard Water Cleaners

Hard water minerals (calcium, magnesium, and iron) will dissolve in acid.

For the safety of the cleaner and the shower surfaces, select the mildest acid possible that still yields quality results.

Use products made with acetic acids, such as white vinegar, or oxalic acid, like Bar Keeper’s Friend. These products are accessible, safe, and effective and provide strong yet gentle scrubbing power to best clean your shower.

Mildew and Mold Cleaners

Mildew and mold must be whitened with an oxidizer to temporarily remove the stain. White vinegar, baking soda, or hydrogen peroxide are all effective for cleaning shower grout.

It’s important to mention that mold cleaners are short-lasting. Mold growing inside infected grout will continue to spread to the surface unless the water source is removed by re-sealing the grout.

Avoid using oxidizers like bleach on rust and iron deposits, as they will make the rust stains more vibrant and harder to remove.

Additionally, you can use white vinegar, baking soda, or hydrogen peroxide to clean mold on window sills and frames too.

In fact, we have a comprehensive how to clean mold off window sills guide that shows you exactly how.

Soap Scum Cleaners

Soap scum responds well to acids, just like hard water. But all the other soils trapped in the scum means you need to add detergents and degreasers to break through and lift the oils and dirt.

Cleaning soap scum with just acids without adding detergents like dish soap will lead to poor removal and needless elbow grease.

Detergents, gentle acids, such as citric and oxalic acid, and disinfectants are excellent and safe cleaners that power through the toughest soap scum. Using these products is the best way to clean your shower.

#3 - Learn the Two-Stage Scrubbing Process

The Two-Stage Scrubbing Process is a simple technique. It provides a deep clean for your shower, while working in a practical and energy-saving way.

Here's how to clean a shower using this method:

An infographic on the two-stage scrubbing process

Step 1: Identify the Surface

Determine how durable the shower surface you are cleaning is.

If the shower is a delicate material like marble, travertine, ceramic, porcelain, or fiberglass, you should never use acids or abrasives. Such abrasives include citric acid and vinegar.

Step 2: Apply the Correct Cleaner

Apply the correct cleaner and allow it to soak for at least 10 minutes, or per the manufacturer’s directions. This is critical to ensuring the cleaner has enough time for the desired chemical reaction.

Dissolving calcium, whitening mold, and breaking apart soap scum all take several minutes, especially if they're thick from neglect.

Step 3: Scrub Once to Loosen Debris

After the correct soaking time, select a gentle broad scrubbing tool, like the softer side of the Microfiber Scrubbing Sponge. Quickly scrub down the shower walls to loosen and wipe off all the easily removed soils.

Use broad, overlapping circles to emulsify soils over a large area quickly.

Step 4: Scrub Twice For Stubborn Spots

After a quick, gentle scrub down, rinse the walls and see what stubborn soils remain. Apply more cleaning products to those target spots and flip the Microfiber Scrubbing Sponge over to use the scrubbing side.

Step 5: Rinse and Dry

After the second scrub, rinse and dry the shower tiles with a Buff™ Microfiber Towel.

Drying is especially important when fighting hard water and soap scum, as the rinse water provides a new dose of hard water chemicals to re-deposit on the freshly cleaned shower.

This final step is a key component in understanding how to clean a shower as it helps you achieve a spotless look.

"These towels are amazing. When I first opened the package I thought, no way these are going to dry as advertised.What a pleasant surprise when I tried them. They work just as advertised. So happy to have them and have recommended them to friends."- Bonnie Benham, Verified Customer

How To Clean The Shower Tile Grout

One of the most stubborn areas of a shower is undoubtedly the grout between the tiles. It can become discolored and moldy over time, and you may not even realize it.

While you may opt for bleach or harsh cleaners to get that grout shining again, grout is more easily eroded than the rest of the shower surface, so using strong, abrasive cleaners is NOT advisable.

To clean shower grout, you may have seen that a mixture of baking soda and white vinegar with a 1:1 ratio can work.

Yet, hydrogen peroxide is one of the best shower cleaners used by professionals. All you need is a toothbrush and a bottle of hydrogen peroxide.

A bottle and a toothbrush

Before using any chemicals, scrub the grout with water to dislodge loose debris. Rinse thoroughly, and then go in with the hydrogen peroxide.

You can start scrubbing immediately to remove mold and mildew with the toothbrush or let the hydrogen peroxide sit on the grout for a few minutes if there are stubborn marks. Remember to pay particular attention to the corners and crevices for the best shower grout clean.

If you find stubborn spots that need attention, apply more hydrogen peroxide and allow it to sit for longer before scrubbing.

Once finished, rinse again and dry with a Buff™ Microfiber Towel. Learning how to clean your shower grout is essential for a pristine bathroom, and this is the most effective and safest way to clean the grout in your shower.

Want five tips on how to keep tile grout cleaner for longer? Read this.

How To Clean Other Parts Of A Shower

This article wouldn’t be complete without showing you how to clean the rest of the shower; the shower head, the shower glass, and the plastic shower curtain liner.

shower head with hard water stains

How to clean a shower head

Perhaps one of the most overlooked parts of our shower is the shower head. While it may not be subject to soap scum, it can be a haven for hard water stains and mildew if neglected.

To clean a shower head follow these steps:

  1. Attach a zip lock or freezer bag filled with white vinegar using an elastic band.
  2. Ensure the shower head is submerged in the vinegar.
  3. Leave this on for 20 minutes or longer.
  4. Remove the plastic, and using a firm toothbrush or small scrubbing brush, scrub into every nook and cranny to remove the calcified build-up.
  5. If there is still some residue, repeat the process and use soap, such as Dawn dish soap, to help loosen and scrub away any debris, rinsing off any residue.

To clean the rest of the shower head, simply remove debris with a wet Buff™ Microfiber Towel, and polish it off with a dry Microfiber Glass Cleaning Cloth.

Note: We have a great article on the best stainless steel cleaner that you might like to read!

How to clean shower glass

The shower glass can be a pain to keep clean, and it’s the first place in a shower to appear dirty. Keep glass spotless by using the scouring side of the Microfiber Scrubbing Sponge and a small amount of dish detergent.

If the surface is still caked on with hard water, mildew, or soap scum, spray with vinegar, allow it to sit for a few minutes, and use a scraper to scrape the buildup layer off.

Be sure to rinse well, follow with a wet Buff™ Microfiber Towel, and finish it off with a Microfiber Glass Cleaning Cloth for a spot-free finish. Regular maintenance of shower glass is a key component of how to clean a shower.

"They really help to get glass clean. Amazing for shower doors to remove spots without chemicals. Which is great for cleaning multiple bathrooms per day professionally or at home." - Heather, Winter Springs, United States

shower glass with water droplets

How to clean a plastic shower curtain liner

If your shower curtain liner is made from plastic, it can get visibly dirty and be difficult to keep clean. But it’s a haven for bacteria and germs, so it’s critical to regularly clean your shower curtain liner.

To clean a plastic shower curtain liner, you’ll want to remove it from the shower and toss it into the washing machine with some detergent and vinegar on a hot cycle. You can also add in some softener.

If it still has some stains that haven’t budged after using this method, place it on a large workable space. Outside is preferable so you can hose it down after cleaning.

Using a detergent and the scouring side of the Microfiber Scrubbing Sponge, work in batches and scrub in a circular motion to remove the buildup. Once clean, rinse off and dry with a Buff™ Microfiber Towel.

"These little wonders are great for washing dishes, but I also use them to clean the bathroom, kitchen everything, and even my floors. I have them color-coded for each task. They last a long time, so they are good for cleaning and for the Earth." - Mary, Appleton, United States

How often should you clean a shower?

If you truly want to clean a shower effectively, the way forward is by creating a schedule. The best schedule includes daily, weekly, and monthly tasks. In this way, you'll prevent dirt buildup, and as a result, maintain hygiene and your shower's aesthetics.

You can follow this schedule:

Daily Tasks

Perform quick tasks such as drying the floor, rinsing the wall tiles, and wiping surfaces. The best time to perform these tasks is after every bath so that you get rid of moisture, body oils, hair, soap, and other elements that cause buildup.

Weekly Tasks

Weekly cleaning involves going beyond daily cleaning and including tasks such as scrubbing the toilet bowl and sink. Also, instead of just using plain water, you'll use a cleaner to loosen dirt and scum. Your weekly schedule should also include cleaning taps, mirrors, toilet paper holders, towel racks, and other fixtures.

Monthly Tasks

It's time to get deep. You see, monthly cleaning should be the most thorough. This is the time to thoroughly scrub grout lines and wall tiles. You'll also perform other tasks that you didn't do weekly, such as removing stains and changing shower curtains.

Occassional Tasks

You'll perform occasional tasks only when the need arises. For instance, if your sink or floor's drainage is slow, that's the right time to unblock it. Another occasional task is resealing grout. You can do it when you notice the sealant is falling apart. It all depends on which task is necessary at the moment.

The Best Tools and Products For Cleaning Your Shower

Efficiency is crucial in the home cleaning industry to save customers money and get the job done as quickly as possible. Keeping the hard work to a minimum is essential, so the cleaning technicians don’t get worn out.

Always keep citric acid, white vinegar, and baking soda in your cleaning arsenal on hand. They're the best shower cleaners as they dissolve scum and hard water stains cleanly and safely.

Also, invest in high-quality Buff™ Microfiber Towels, Microfiber Scrubbing Sponges, Microfiber Glass Cleaning Cloths, a grout cleaning brush, and a scraper to clean your shower like a pro.

tools for cleaning infographic

Extra: Professional Cleaning Tips

When cleaning your shower, be sure to:

  • Identify what you are trying to clean, be it hard water, mold, mildew, or soap scum.
  • Select the appropriate cleaning solutions, always choosing quality products that won’t damage the shower surfaces or your skin.
  • Work smarter, not harder, by using the Two-Stage Scrubbing Process.

When you follow these steps, you'll be applying the best techniques to clean and maintain your shower.

If you've settled on a microfiber cleaning kit, consider our selection of best-selling microfiber cleaning kits.

In the table below, we recap the different parts of a shower, the cleaning method for each, and recommended products.

Cleaning Troubles Recommended Solvent Cleaning Method

Soap scum, mold on shower tiles and grout

Baking soda and white vinegar mixture (1:1 ratio)


  1. Spread the baking soda-vinegar paste on the tiles
  2. Allow to sit for 10 minutes
  3. Scrub with a brush
  4. Rinse and dry

Rust, hard water stains on shower head

White vinegar

  1. Half-fill a ziplock bag with vinegar and attach it to the showerhead, ensuring it's submerged in the vinegar
  2. Let sit for about 20 minutes
  3. Scrub all the openings with a toothbrush
  4. Rinse thoroughly by turning on the tap

Soap scum on shower glass

White vinegar and dish detergent

  1. Spray glass with vinegar & detergent solution
  2. Allow to sit for 10 minutes
  3. Scrape off the buildup layer with a plastic scraper
  4. Apply dish soap and gently scrub with Buff™ Microfiber Towel.
  5. Rinse and finish with a Microfiber Glass Cleaning Cloth

Safety Precautions While Cleaning a Shower

It's essential that you protect yourself, your family, and your pets while cleaning a shower. But what exactly are you protecting everyone from?

Chemical exposure.

Chemical exposure is likely to occur when humans, animals, and plants come into direct contact with, or inhale toxic cleaning products.

Therefore, it's important to be cautious not only while cleaning, but also how you dispose of the waste and chemical containers. When you discard them properly, you're protecting plants and marine life from pollution.

Let's look at the safety precautions you should follow:

  • Clad yourself in protective gear: Put on goggles, a face mask, gloves, a long-sleeved shirt, pants, and chemical-resistant shoes so that don't come in direct contact with abrasive cleaning products.
  • Allow adequate air in the shower: You can open windows and doors to let in fresh air. Alternatively, turn on the fan so that it sucks the chemical's fumes.
  • Pay attention to instructions on the label: The product's label will inform you how to measure the product, what not to mix with, and other dos and don'ts that will help avoid chemical exposure.
  • Dispose of the waste properly: Ensure you don't discard any chemicals down your drain or flush them in the toilet unless the instructions indicate so. Instead, follow your local regulations for disposing of chemical waste.
  • First aid preparedness: A first aid kit is a lifesaver in case of chemical exposure. Have it around always because you never know when you might need to use it.

Preventative Maintenance Tips for Your Shower

What do we mean by preventative maintenance?

In the context of cleaning, the term refers to scheduling regular maintenance for your shower to reduce the likelihood of dirt buildup, thereby saving you the need for frequent cleaning.

Preventative maintenance also saves you money spent on purchasing a host of chemicals to get rid of dirt and grime accumulated over the months.

Some of these preventative measures include:

  • Rinsing shower tiles: You can use the shower head to direct a stream of water on the walls. This eliminates soap foam that splatters while showering.
  • Draining water from the floor: A squeegee is a handy tool that will help you push excess water off the floor and into the drain, preventing buildup of scum, mold, and hard water stains.
  • Opening windows or fan: Make it a habit to keep your shower windows open, or at least turn on the fan after taking a bath so that moisture is drawn out to prevent a moldy smell.
  • Sealing grout regularly: Grout absorbs dirt and moisture easily. Therefore, regularly inspect your grout lines for worn sealing and reapply it to prevent scum buildup and stains.
  • Don't forget the shower curtain: Remember to wipe down the curtain after showering to keep it scum and mold-free. Also, don't keep it bunched. Spread it out to facilitate drying.

So, as you plan your next cleaning session, let your ultimate cleaning experience begin with an ultimate cleaning kit, designed to help you tackle every cleaning task.

You can also use these other cleaning supplies we've mentioned:

With an average 3.7 star rating on Trustpilot, join over a thousand buyers and explore all our best selling microfiber cleaning kits for your bathroom.

Easiest Way To Mop Your Floors


Related Products

  • Featured Articles

    product_16-x16-buff-pro-multi-surface-microfiber-towel-12-packproduct_professional-microfiber-mop-system-1 How to Mop a Floor — Best Practices
    product_16-x16-buff-pro-multi-surface-microfiber-towel-12-packproduct_chenille-microfiber-high-duster-2-pack 5 Tips to Make Cleaning Less of a Chore
    product_10-chenille-microfiber-mucho-mop-kitproduct_16-x16-buff-pro-multi-surface-microfiber-towel-12-packproduct_chenille-microfiber-high-duster-2-packproduct_product_18-chenille-microfiber-mucho-mop-kitproduct_professional-microfiber-mop-system-1product_ultimate-microfiber-cleaning-kit Spring Cleaning in a Box: The Ultimate Microfiber Cleaning Kit
    FAQ's

    Find answers to our most frequently asked questions.

    How To Videos

    Watch how to efficiently and effectively use your microfiber.

    Articles

    Articles and tech tips on how to best use and care for your microfiber.

    Interviews

    Learn the best microfiber cleaning techniques from practiced professionals.