Skip to content
Your Cart
Add More. Save More. Ship Free.

Microfiber Glass Cleaning Pack

$16.98

5x7 Microfiber Lens & Glass Cleaning Cloth - 2 Pack With Case

$7.98
Select Color: Paisley

10" Microfiber Scrubber Mop

$13.98

16 "x 16" Buff™ Detail 400 GSM Microfiber Towel

$19.98
Select Color: Gray
Person cleaning floor near a toilet with appropriate cleaning chemicals.

Hard Floor Cleaning Chemicals: What to Use, When, and How

Disclosure: This post may contain affiliate links.

Floors are one of those surfaces that show every slip, spill, and smudge, and in a professional cleaning context, they can make or break your client’s impression. Unfortunately, many well-intentioned cleaning crews end up with streaks, dull finishes, or even damage when they use the wrong chemicals or methods.

Hard floor surfaces aren’t all created equal, and a “one-size-fits-all” cleaner approach can backfire. A degreaser that works great on concrete might eat into a finish on luxury vinyl or leave behind a haze you can’t buff out.

If you want your clients’ floors to look clean, consistent, and long-lasting, you have to match the right cleaning chemistry, tools, and dwell time to each floor type. We’ll break down the top hard floor cleaning chemicals professionals use, when to use them, how to apply them (including dwell time and agitation), and how to avoid the most common mistakes.

Let’s dive in!

Person mopping floor next to a green cleaning cart.

1. Why Understanding Floor Cleaning Chemistry Matters

Every professional cleaner knows that a clean floor isn’t just about elbow grease, it’s about chemistry. The pH balance of a product determines what types of soils it can remove, while surfactants work to lift and suspend dirt so it can be wiped or rinsed away. Chelating agents also play a key role by preventing minerals in water from interfering with the cleaner’s performance.

Using the wrong cleaner can damage finishes, dull a floor’s gloss, or even create slippery residues. The secret to consistently great results lies in balancing pH, dwell time, and mechanical action to achieve the perfect clean.

2. The Main Types of Hard Floor Cleaning Chemicals

Alkaline Cleaners (pH 9–12)

Alkaline cleaners are the go-to choice for cutting through heavy grease, oils, and industrial grime. They’re most effective on hard surfaces like concrete, quarry tile, and VCT in heavily trafficked or food-service environments. However, they should be avoided on marble, limestone, or any unsealed natural stone, as high alkalinity can cause etching or surface damage.

These cleaners typically need a dwell time of 5–10 minutes to work effectively, but it’s important to keep the surface wet during this period. They can be applied using an autoscrubber, mop, or rotary floor machine equipped with a medium pad. The cleaning action comes from saponification, a chemical reaction in which alkalinity turns fats and oils into soap, allowing them to be rinsed away easily.

Pro Tip: Always rinse thoroughly to prevent white film or residue buildup.

Neutral Cleaners (pH 6–8)

Neutral cleaners are designed for everyday maintenance cleaning on delicate or sealed surfaces. They work well on LVP, LVT, sealed wood, laminate, polished stone, and vinyl, basically any flooring that requires gentle care. Because they’re pH-balanced, they remove dirt without dulling protective finishes or leaving behind harsh residues.

With a short dwell time of just one to three minutes, neutral cleaners are efficient and safe for frequent use. They can be applied with a flat mop, microfiber system, or autoscrubber fitted with a soft pad. These solutions use mild surfactants to lift and suspend light soils while protecting the floor’s appearance.

Pro Tip: Ideal for daily maintenance; overuse can still lead to residue if not diluted properly.

Person mopping a floor with a blue mop in a bright room.

Acidic Cleaners (pH 1–4)

Acidic cleaners are formulated to tackle mineral deposits, rust, efflorescence, and soap scum, the kinds of buildup alkaline products can’t touch. They’re best suited for ceramic or porcelain tile and concrete surfaces that have mineral residue, but they should never be used on marble, terrazzo, travertine, or limestone, as acids can permanently etch those materials.

These cleaners typically require only two to five minutes of dwell time, followed by a thorough rinse. They can be applied using a mop or deck brush, with a wet vac recommended for recovery. The science behind them lies in their ability to chemically dissolve mineral deposits and neutralize alkaline residues, restoring surface cleanliness and brightness.

Pro Tip: Always rinse and neutralize, acid left on the surface can etch or pit finishes.

Enzymatic & Bio-Based Cleaners

Enzymatic cleaners rely on biological processes rather than harsh chemicals to break down organic soils like grease, food residue, and bodily fluids. They’re particularly effective for cleaning grout lines, restrooms, kitchens, and other odor-prone areas where organic buildup occurs.

These solutions need more dwell time (usually up to 15 minutes) because enzymes work gradually to “digest” soils. They can be applied with a mop, foaming applicator, or sprayer, depending on the surface and soil load. This type of cleaner is a favorite among green cleaning professionals because it’s both effective and environmentally friendly.

Pro Tip: Great eco-friendly option for regular maintenance and odor control.

Person using a blue cleaning tool near a toilet on tiled floor.

Disinfectant Floor Cleaners

Disinfectant cleaners are essential in environments where hygiene is critical, such as healthcare facilities, daycares, and food service areas. These solutions are designed to kill bacteria, viruses, and other pathogens on nonporous surfaces. Common types include quaternary ammonium compounds (quats), hydrogen peroxide-based cleaners, and hypochlorite (bleach) blends.

Most disinfectants require a dwell time of five to ten minutes, and surfaces must remain visibly wet throughout this period for full germicidal efficacy. They can be applied using a flat microfiber mop or electrostatic sprayer for even coverage. The chemistry behind disinfectants lies in their ability to denature microbial proteins, effectively neutralizing harmful microorganisms.

Pro Tip: Surfaces must remain wet for the entire dwell period to achieve disinfection.

Solvent & Degreasing Cleaners

Solvent and degreasing cleaners are designed for heavy-duty applications such as garage floors, manufacturing facilities, or areas contaminated with oils, adhesives, or waxes. They dissolve substances that water-based cleaners can’t touch. However, they should never be used on LVT, vinyl, linoleum, or sealed wood, as solvents can soften or damage the surface finish.

Dwell time varies depending on the product and soil type, so it’s important to follow manufacturer instructions. Apply these cleaners with a scrubber fitted with solvent-resistant pads. Because many solvents are flammable or high in VOCs, proper PPE and ventilation are essential.

Pro Tip: Great for stripping or restoring concrete, but not for routine cleaning.

3. Matching Cleaner to Flooring Material

Table comparing flooring types, suitable cleaners, and additional notes.
Table comparing safe cleaning methods for different flooring types.

4. Dwell Time, Agitation & Tools: The Winning Trio

Even the most powerful floor cleaner won’t perform at its best if it’s not applied correctly. Each step in the cleaning process (dwell time, agitation, and recovery) plays a critical role in achieving consistent, streak-free results.

Dwell time allows the chemical to break down soils before you start scrubbing. The longer the product remains wet on the surface (within safe limits), the more effectively it can react with and lift dirt. For tougher soils, extending dwell time gives the chemistry more opportunity to do the work for you.

Agitation, using pads, brushes, or autoscrubbers, provides the mechanical action needed to loosen embedded grime and enhance cleaning performance. The right amount of pressure and motion ensures soils are fully dislodged without damaging the surface.

Rinsing or recovery is just as important. This step removes suspended dirt and chemical residue that can cause haziness, streaks, or even slip hazards if left behind.

Pro Tip: Move slower with an autoscrubber for deeper cleaning, longer dwell = better chemical performance.

5. Residue Control & Neutralization

Residue is a professional cleaner’s silent saboteur. Even after a floor looks clean, leftover product can dull the surface, reduce traction, and cause rapid re-soiling. Controlling residue is essential for maintaining the appearance and safety of any hard floor.

Always rinse after using high-alkaline or acidic products, as these can leave behind films that attract dirt or compromise protective coatings. When preparing a surface for refinishing, use a neutralizing rinse to balance the pH and ensure the finish bonds properly. For autoscrubbers, opt for low-foaming, neutral cleaners to minimize residue and protect your equipment.

Microfiber mops and pads are another effective tool in residue prevention as they trap particles and absorb excess moisture, reducing streaks and preventing redeposition on freshly cleaned floors.

6. Safety, Dilution & Eco Considerations

Safety and sustainability go hand in hand in professional cleaning. Always follow SDS (Safety Data Sheet) guidelines and mix chemicals according to manufacturer dilution ratios, remember, stronger solutions aren’t cleaner, just riskier. Over-concentration can damage surfaces, harm finishes, and create unnecessary exposure risks.

All secondary bottles and containers should be clearly labeled and stored securely to avoid confusion or chemical reactions. When working with acids or solvents, wear appropriate PPE, including gloves, goggles, and protective clothing. Adequate ventilation is especially important when using products with high VOC content.

Finally, whenever possible, choose low-VOC, biodegradable cleaners to minimize environmental impact. These products not only improve indoor air quality but also align with modern sustainability standards that many clients now expect from professional cleaning services.

7. Troubleshooting Common Floor Issues

Table listing common flour issues, causes, and fixes.
Table listing common floor issues, causes, and solutions.

Smart Chemistry = Smart Cleaning

Choosing the right chemical for the right floor is more than a detail, it’s the difference between a job that looks great for a day and one that stands up to wear, traffic, and client expectations. When you match cleaner type (alkaline, neutral, acidic, enzymatic, disinfectant, solvent) to both the soil makeup and the flooring material, you set yourself up for efficiency, fewer mistakes, and longer-lasting results.

But even the right chemical won’t perform if you neglect dwell time, agitation, rinsing, and residue control. In practice, your success comes from balancing those mechanical and chemical factors while protecting finishes, avoiding damage, and maintaining safety.

Next time you step onto a jobsite, you can confidently specify not just “a cleaner,” but the cleaner; the right formula, right tool, right dwell, and right rinse for the job at hand.
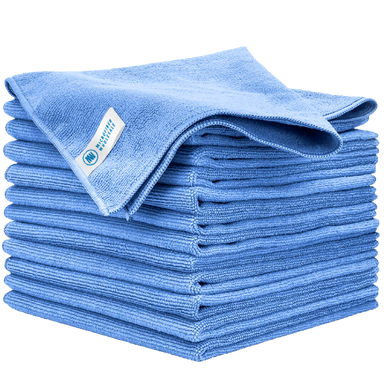
Our curated cleaning kit for professionals

We’ve curated a cleaning kit of our top products that our professional cleaning customers purchase over and over again. It contains three full days’ worth of high quality supplies for one cleaner, including four types of microfiber towels, microfiber dusters, scrubbers, heavy duty mops, and a laundry bag.

All this would usually cost you $500. Get it for $299.

Deep Clean Hard Floors, Effortlessly.


  • Featured Articles

    How Long Should You Let Cleaners Sit? The Truth About Dwell Time
    10 Bleach Mistakes You’re Probably Making
    10 Chemical Cleaning Mistakes Pros Still Make