Skip to content
The Best Way to Clean Showers, Tubs, and Toilets

The Best Way to Clean Showers, Tubs, and Toilets

Lions, Tigers, Bears… and Bathrooms?!

In the cleaning world, showers, tubs, and toilets are practically the lions, tigers, and bears in Wizard of Oz, especially when it comes to the fear they induce! These core bathroom features can turn both Professional and Amateur cleaners' faces greener than the Wicked Witch of the West, thanks to their sickening combination of germs, slimes, stains, and heavy labor.

But what if, just like Dorothy with her ruby slippers, you have the power to transform your bathrooms sitting right under your nose? All you need is someone to show you how to click them, right?

Well, Ding-dong the Merry-o because your Glinda the Good Witch, cleaning expert Melissa Homer, is here to reveal the most heavily guarded professional tips and techniques to tame showers, tubs, and toilets for good. With a little magic fairy dust and the right tools, she’ll cut your bathroom cleaning times in HALF!

Now let’s find out what’s hiding behind that big green curtain together…

Don't Rush Fairy Dust: The Importance of Dwell Time

Picture this: You've spent all afternoon carefully measuring, mixing, and kneading the perfect loaf of bread. Now, when the oven is hot and it’s time to bake, you barely tap the bread pan on the oven racks and start munching on the raw dough. What type of monster would do that, right?! That’s the same question the chemists want to ask you every time you abuse their cleaning products.

The tragic tale of cleaning chemistry is often a story of what should have been. All cleaning products are designed to chemically react with the soils you are trying to remove and transform them in some way to make them easier. If you try to remove the soil before that transformation is complete, not only are you missing all the benefits, you could be making things even worse than when you started!

Pre-spraying surfaces with the right chemicals and granting them the appropriate dwell time is like sprinkling fairy dust over your cleaning routine. By rushing the process, you may actually unleash dark magic. Take disinfectants, for example. A hasty spray and wipe-down will kill weaker germs, but it leaves the more resilient ones behind, creating stronger, more defiant superbugs.

Likewise, when we don't allow hard water cleaners enough time to dissolve the minerals, we end up not only having to use extra elbow grease but we risk scrubbing so hard that we scratch faucets, stone, and fiberglass.

Worst of all, skipping dwell time not only wastes energy, it wastes money too! The cost of cleaning products is only justified by their resulting labor savings. If you don’t let the chemicals make your job faster or easier, it is like flushing money down the very toilet you’re scrubbing. Spraying products we don’t actually allow to help us is just useless theater… smoke and mirrors create the illusion of help that never comes. Like the real Wizard of Oz hiding behind the curtain, but with no ruby slipper backup!

To unleash your cleaning solution’s magic, always follow the manufacturer's instructions! As a general guideline, most bathroom cleaning products should soak for at least 10 minutes before scrubbing. Before you panic that you’ll be twiddling your thumbs, let me assure you that there will ALWAYS be plenty to clean to fill that time.

Here’s the list the Professionals use to fill that 10-minute dwell time:

    1. Pre-spray the toilet, tub, and shower the moment you enter a bathroom.  

    2. Use a microfiber high duster to remove cobwebs and dust shower air vents

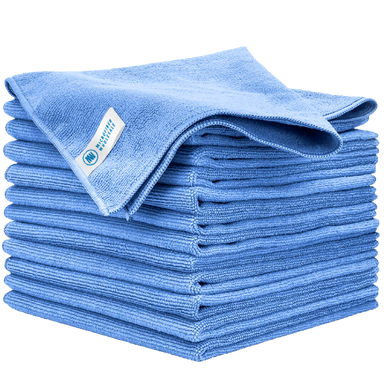
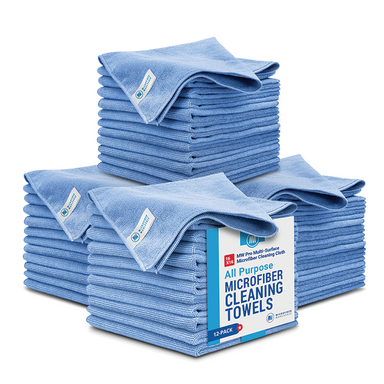
    3. Clean mirrors and picture frames with a multi-surface microfiber towel.

    4. Swap out and fold all the towels. Remove bath mats from the floor and shake them out.

    5. Wipe down doors, cabinets, drawers, handles, and knobs with a multi-surface microfiber towel.

Those 10 minutes will fly by in a blink, rewarding you with toilets that are 10X easier to tackle!


The Ultimate Magic Wand for Showers & Tubs:
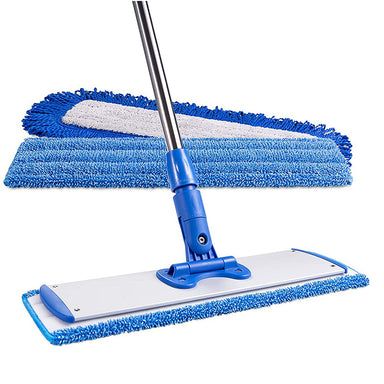
The Contour Scrubbing Mop Frame

When it comes to bathroom cleaning, especially the challenging expanse of modern massive showers and tubs, every cleaner dreams of having that magical tool that can transform the arduous task into a breeze. Enter the Contour Scrubber – the professional cleaning world's best-kept secret.

Imagine being able to reach every nook, cranny, and contour of a massive bathtub or towering walk-in shower, all while standing securely on dry ground. That's the magic of the Contour Frame. This transformative tool is crafted from industrial-grade rubber, offering the perfect blend of strength and flexibility so that you can scour without fear of scratching, even on curved and delicate surfaces. It attaches to an extendable mop pole, resulting in a scrubber that can reach high and low without crouching or stretching, protecting your back and your bathroom at the same time!

But the genius of the Contour Frame isn't just the adaptability; it’s the efficiency. Its design promotes ergonomic cleaning, encouraging users to utilize their core muscles to clean, not just their arms. Much like mopping floors, where making figure 8s with a mop covers so much more ground quicker than scrubbing on your hands and knees, the contour frame lets you clean showers and tubs in record time.

The Contour Frame allows for broad sweeping motions that cover entire shower walls in mere moments, expending minimal energy compared to traditional scrub brushes. When it’s time to scour a stubborn spot, the cleaner can use their body weight, core muscles, and both arms, creating a deeper and more forceful scouring result with far less strain than one tired little arm with a sponge!

Safety, too, is front and center with the Contour Frame. Cleaners can maintain a safe distance from perilous, slippery shower floors, standing on dry ground and minimizing the risk of slips and falls. For more intensive bathroom cleans, with unsettling levels of soil, being able to stand at a distance from the grime is also an added psychological benefit, especially for novice cleaners.  

And for those cleaning in properties with high-end, delicate flooring, keeping your shoes dry and reducing the likelihood of tracking chemicals is an added bonus that cannot be underestimated.

While many electronic gadgets have attempted to fight the same battle as the Contour Mop, they all fall short in terms of durability, convenience, and affordability. The fuss of charging batteries, engine burnouts, and easily broken attachments quickly negated their supposed scrubbing power.

In contrast, the Contour frame was designed for years of daily commercial use, but with a design so simple and straightforward that any home user can master it in one session! This isn't mere speculation. Having witnessed its performance across hundreds of MaidPro locations in the US and Canada for years, I can personally vouch for its durability and performance.

Cleaning Showers and Tubs with the Contour Scrubber:
A Step-by-Step Guide

1. Gather Your Supplies:

2. Pre-Spray:

Generously spray your bathroom cleaner over the entire shower and tub area. Let it sit for at least 10 minutes to break down the grime and hard water.

3. Setup Scrubber:

Ensure the Contour Scrubber is securely attached to its pole. Adjust the pole's length to the shortest setting to avoid banging into items as you scrub. Attach one of the following pads depending on the soil level.

4. Start Scrubbing:

Starting from the top, methodically scrub the walls, followed by the tub basin or shower floor. Hold the pole with both hands, engage your core muscles, and make broad up and down strokes to cover large areas. Press the pad into edges and corners, scrubbing back and forth to ensure full coverage.

5. Don’t Forget Details:

Using the detail brush/toothbrush, quickly scrub around details like faucet fixtures, drains, jets, and edges, to loosen any soils that could not be reached by the Contour.

6. Rinse Away:

Using the showerhead, rinse cup or a microfiber cloth dipped in warm water, rinse away the cleaner and dissolved grime.

7. Dry Surfaces:

Wipe down the shower and tub with a dry microfiber towel to prevent water spots.

8. Preventative Maintenance:

For easier future cleaning, think about applying a water repellent spray or sealant. (Suggested: 511 Impregnator Sealer or Lifeproof Ceramic Coatings)

The Trick to Taming Toilets

Toilets can be the source of many cleaning woes, from disgusting germs to stains that won’t seem to budge. But the secret to conquering the commode lies not in complicated rituals but in understanding the basics of the chemistry involved and maintaining a routine, along with a few special tricks from the experts sprinkled in for good measure!

Frequency is Your Friend:

Cleaning toilets is a task most dread, but the key to keeping them in check lies in regular maintenance. Frequent cleaning prevents stubborn build-ups and reduces the need for heavy scrubbing sessions.

Properly Identify Your Stain Enemies:

Knowing the difference between hard water stains and mold or mildew is crucial. Mold and mildew can present as pink or black patches, whereas hard water stains often resemble the greenish hue of the Statue of Liberty, the orange tint of rust, or even a deep brown.

Mineral-based stains and mold based stains must be treated very differently. Mineral stains call for acids that help dissolve them. Mold and mildew can be treated with bleach which whitens and kills spores.

Use Caution with Chemistry:

The two critical mistake to avoid is NEVER use bleach on iron or rust stains and NEVER use bleach and acid together. The bleach will oxidize the iron causing the metal to rust more, making it even more challenging to remove. Bleach will also react with acids like hard water cleaners and vinegar, releasing toxic deadly fumes.

Let The Soap Soak:

Before every clean, spray a generous amount of bathroom cleaner on the entire toilet, inside and out, including often forgotten spots like the toilet base and under the seat. Let the spray soak for at least 10 minutes to break down grime, minerals, and germs.

Move Methodically:

The key to getting a fully clean toilet without wasting tons of microfiber towels is to work strategically. Start from the outside and work your way in, from the top down. From toilet tank lid to base, from lid to under seat, then finally, the inner bowl. This technique ensures that germs are managed effectively and that you're not just spreading them around. Cleaning systematically also reduces the chances of missing spots, ensuring a thorough clean.

Embrace Abrasives:

When even a long soak in the right acidic bowl cleaner hasn’t dissolved stubborn mineral buildup, don’t be scared of employing the professional’s favorite, the Pumie stick. This pumice stone brick is just hard enough to scrape off minerals without being so hard as to scratch porcelain, so scour with confidence and watch the worst deposits melt away with only a few strokes.

Color Code Your Tools:

Microfiber cloths have changed the cleaning game, but to prevent cross-contamination, color-coding is essential too. Red is the universal color for toilets. By ensuring that microfiber cloths used on toilets are exclusively red, you eliminate the risk of inadvertently spreading toilet germs to other parts of your home.

Step-by-Step Toilet Cleaning Instructions:

    1. Prepare Your Supplies:

        1. A bristle toilet brush

        2. Toilet bowl cleaner (Bleach or Acid)
          Clorox Clinging Bleach Gel
          Zep Acidic Toilet Bowl Cleaner

        3. Bathroom Cleaning Spray (Bleach or Acid)
          Lysol Power Foaming Cleaning Spray (acidic)
          Tilex Mold & Mildew (bleach)

        4. A pumice stick (Pumie stick)

        5. Microfiber Multisurface Towels (Red Color Coding Recommended)

    2. Identify Stains:

Before starting, inspect the toilet for stains. Determine if they are hard water stains (greenish, rust orange, or brown) or mold/mildew (pink or black).

3. Select Bleach or Acid Attack:

Use acidic spray and bowl cleaner for minerals and bleach spray and bowl cleaner for mold. NEVER use an acidic and bleach-based cleaner on the same toilet at once, as dangerous fumes can result from mixing chemicals.

4. Apply Bathroom Cleaners:

Spray the bathroom cleaner all over the toilet – on the exterior and interior, ensuring to cover the base, the underside of the seat, and other often overlooked areas. Apply bowl cleaner under the rim and inside the bowl

5. Take 10:

Allow the bathroom cleaner to soak for a minimum of 10 minutes. This soaking will help break down grime, minerals, and germs, making the scrubbing process more effective. Longer may be necessary for heavily neglected mineral build-up.

10. Start from the Outside Top:

Begin your cleaning process from the outermost parts of the toilet. Clean the toilet tank lid first.

11. Move to the Outside Bottom:

After the tank lid, progress to the tank, working your way down to the base. Don’t forget to wipe the patch of floor behind the base, as most mops will not fit there.

12. Clean the Seat:

Wipe down the top of the toilet seat, and don’t forget to lift it and clean the underside as well. Then wipe down the seat and the underside of the seat, being sure to wipe out soils hidden under the seat by the hinge. Dispose of the towel immediately after to be laundered, and do not use it on any other surface.

13. Brush the Bowl:

Now, attend to the inner bowl. Scrub with the brush, first scour under the rim and then clean the main area of the bowl in methodical overlapping strokes. Flush and check your work, scrubbing more as needed. Rinse the brush in freshly flushed water.

14. Tackle the Tough Stuff:

If there are hard water stains that haven't budged even after a soak and scrub, this is the time to use the Pumie stick. Reapply some bathroom spray and scrub away stubborn mineral deposits. Be sure the toilet is fully clean, disinfected, and flushed before attempting to scrub away mineral deposits.

There’s No Place Like (a Clean) Home!

Just as Dorothy braved the unknown terrains of Oz, you've just journeyed through the dark forest of bathroom cleaning and emerged victorious. With each step of your metaphorical ruby slippers, you've gained the tools and knowledge to face these household challenges head-on. No longer will showers, tubs, and toilets stand as daunting adversaries; they're merely tasks waiting to be tamed with the right approach and equipment.

Dorothy’s journey through Oz, much like our journey through cleaning, teaches us that often, our biggest fears can easily be conquered with the right companions and tools by our side. We hope we’ve proven, yet again, that with Microfiber Wholesale products in your hands and Melissa Homer’s advice at your fingertips, there’s no cleaning task you can’t tackle!

So, with newfound confidence, stride forth and make your bathroom sparkle and shine, but resist the urge to click your heels and chant, “There’s no place like a clean home!” lest your clients and family think you’ve lost it!

Before you conclude your adventure and settle back into your normal daily life, remember to set a reminder for next Tuesday, 8/22. Join us again as we dive deep into "Terrific Tile: Deep Dive into Microfiber for Grout & Floor Care."

Deep Clean Hard Floors, Effortlessly.


Related Products

  • Featured Articles

    How to Clean Your Dishwasher Like a Pro
    How to Organize Your Home Cleaning Supplies Like a Pro
    7 Surprising Places in the Home You Forget to Clean
    FAQ's

    Find answers to our most frequently asked questions.

    How To Videos

    Watch how to efficiently and effectively use your microfiber.

    Articles

    Articles and tech tips on how to best use and care for your microfiber.

    Interviews

    Learn the best microfiber cleaning techniques from practiced professionals.

    Continue To Cart Continue To Customize

    By continuing with your order, you acknowledge and agree to the following:

    Our property-marked towels are printed with a repeating pattern, and logo placement may vary from towel to towel.

    You’ve chosen between receiving an emailed digital proof for a detailed review of your design at an additional cost of $20, or allowing our print team to use your uploaded file to prepare your order for printing.

    We do not accept returns for printed property marked towels.